
#
Quick Start
Prerequisites
A workspace must already be provisioned with you as its owner. If you are the one ordering it, start at Provision Phoeniqs AI Build.
Your workspace arrives with the essentials in place: the agent is connected to your Base LLM API, the built-in agents are ready, and the browser and code-intelligence tools are connected. What remains is connecting it to your code.
#
1. Sign in
Open your workspace's URL. You get it from Launch product on the subscription in the Phoeniqs Console, or from whoever provisioned the workspace for you.
Sign in with your PHOENIQS account, the same one you use for the Phoeniqs Console, either with your e-mail and password or with one of the linked sign-in options.
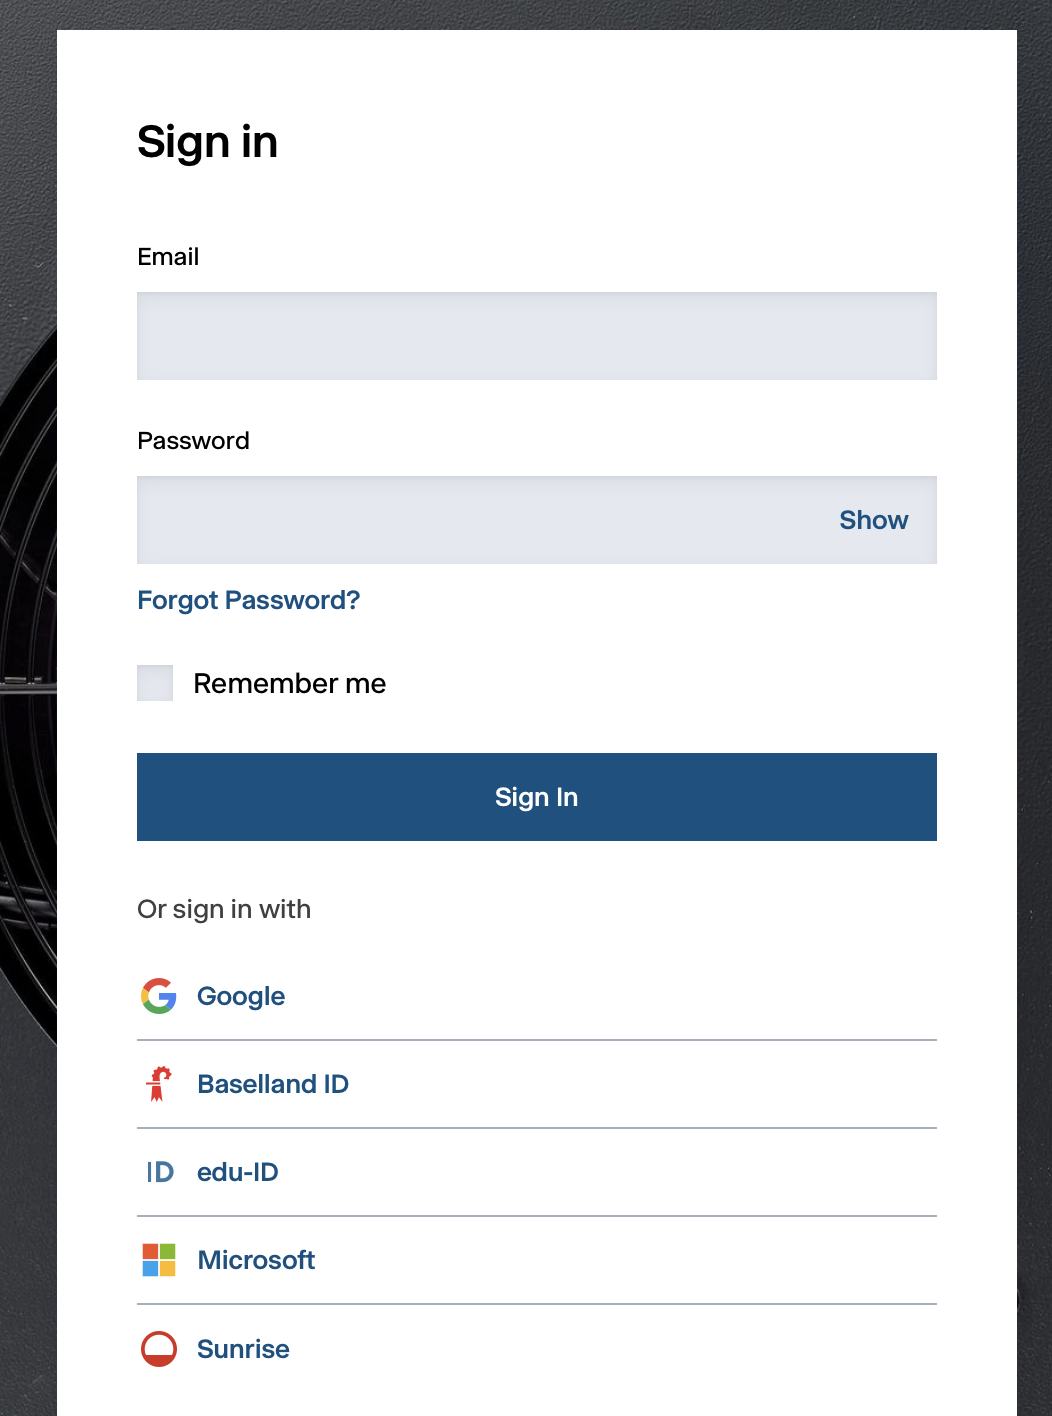
Only the owner can open a workspace. Anyone else sees a page explaining that the workspace belongs to someone else.
#
2. Check out the company settings
Company settings are the agent rules, skills and configuration your team shares. They are not loaded until you check them out.
- Go to Settings → Company.
- Leave the prefilled Repository URL and the Production (recommended) channel as they are.
- Click Check out.
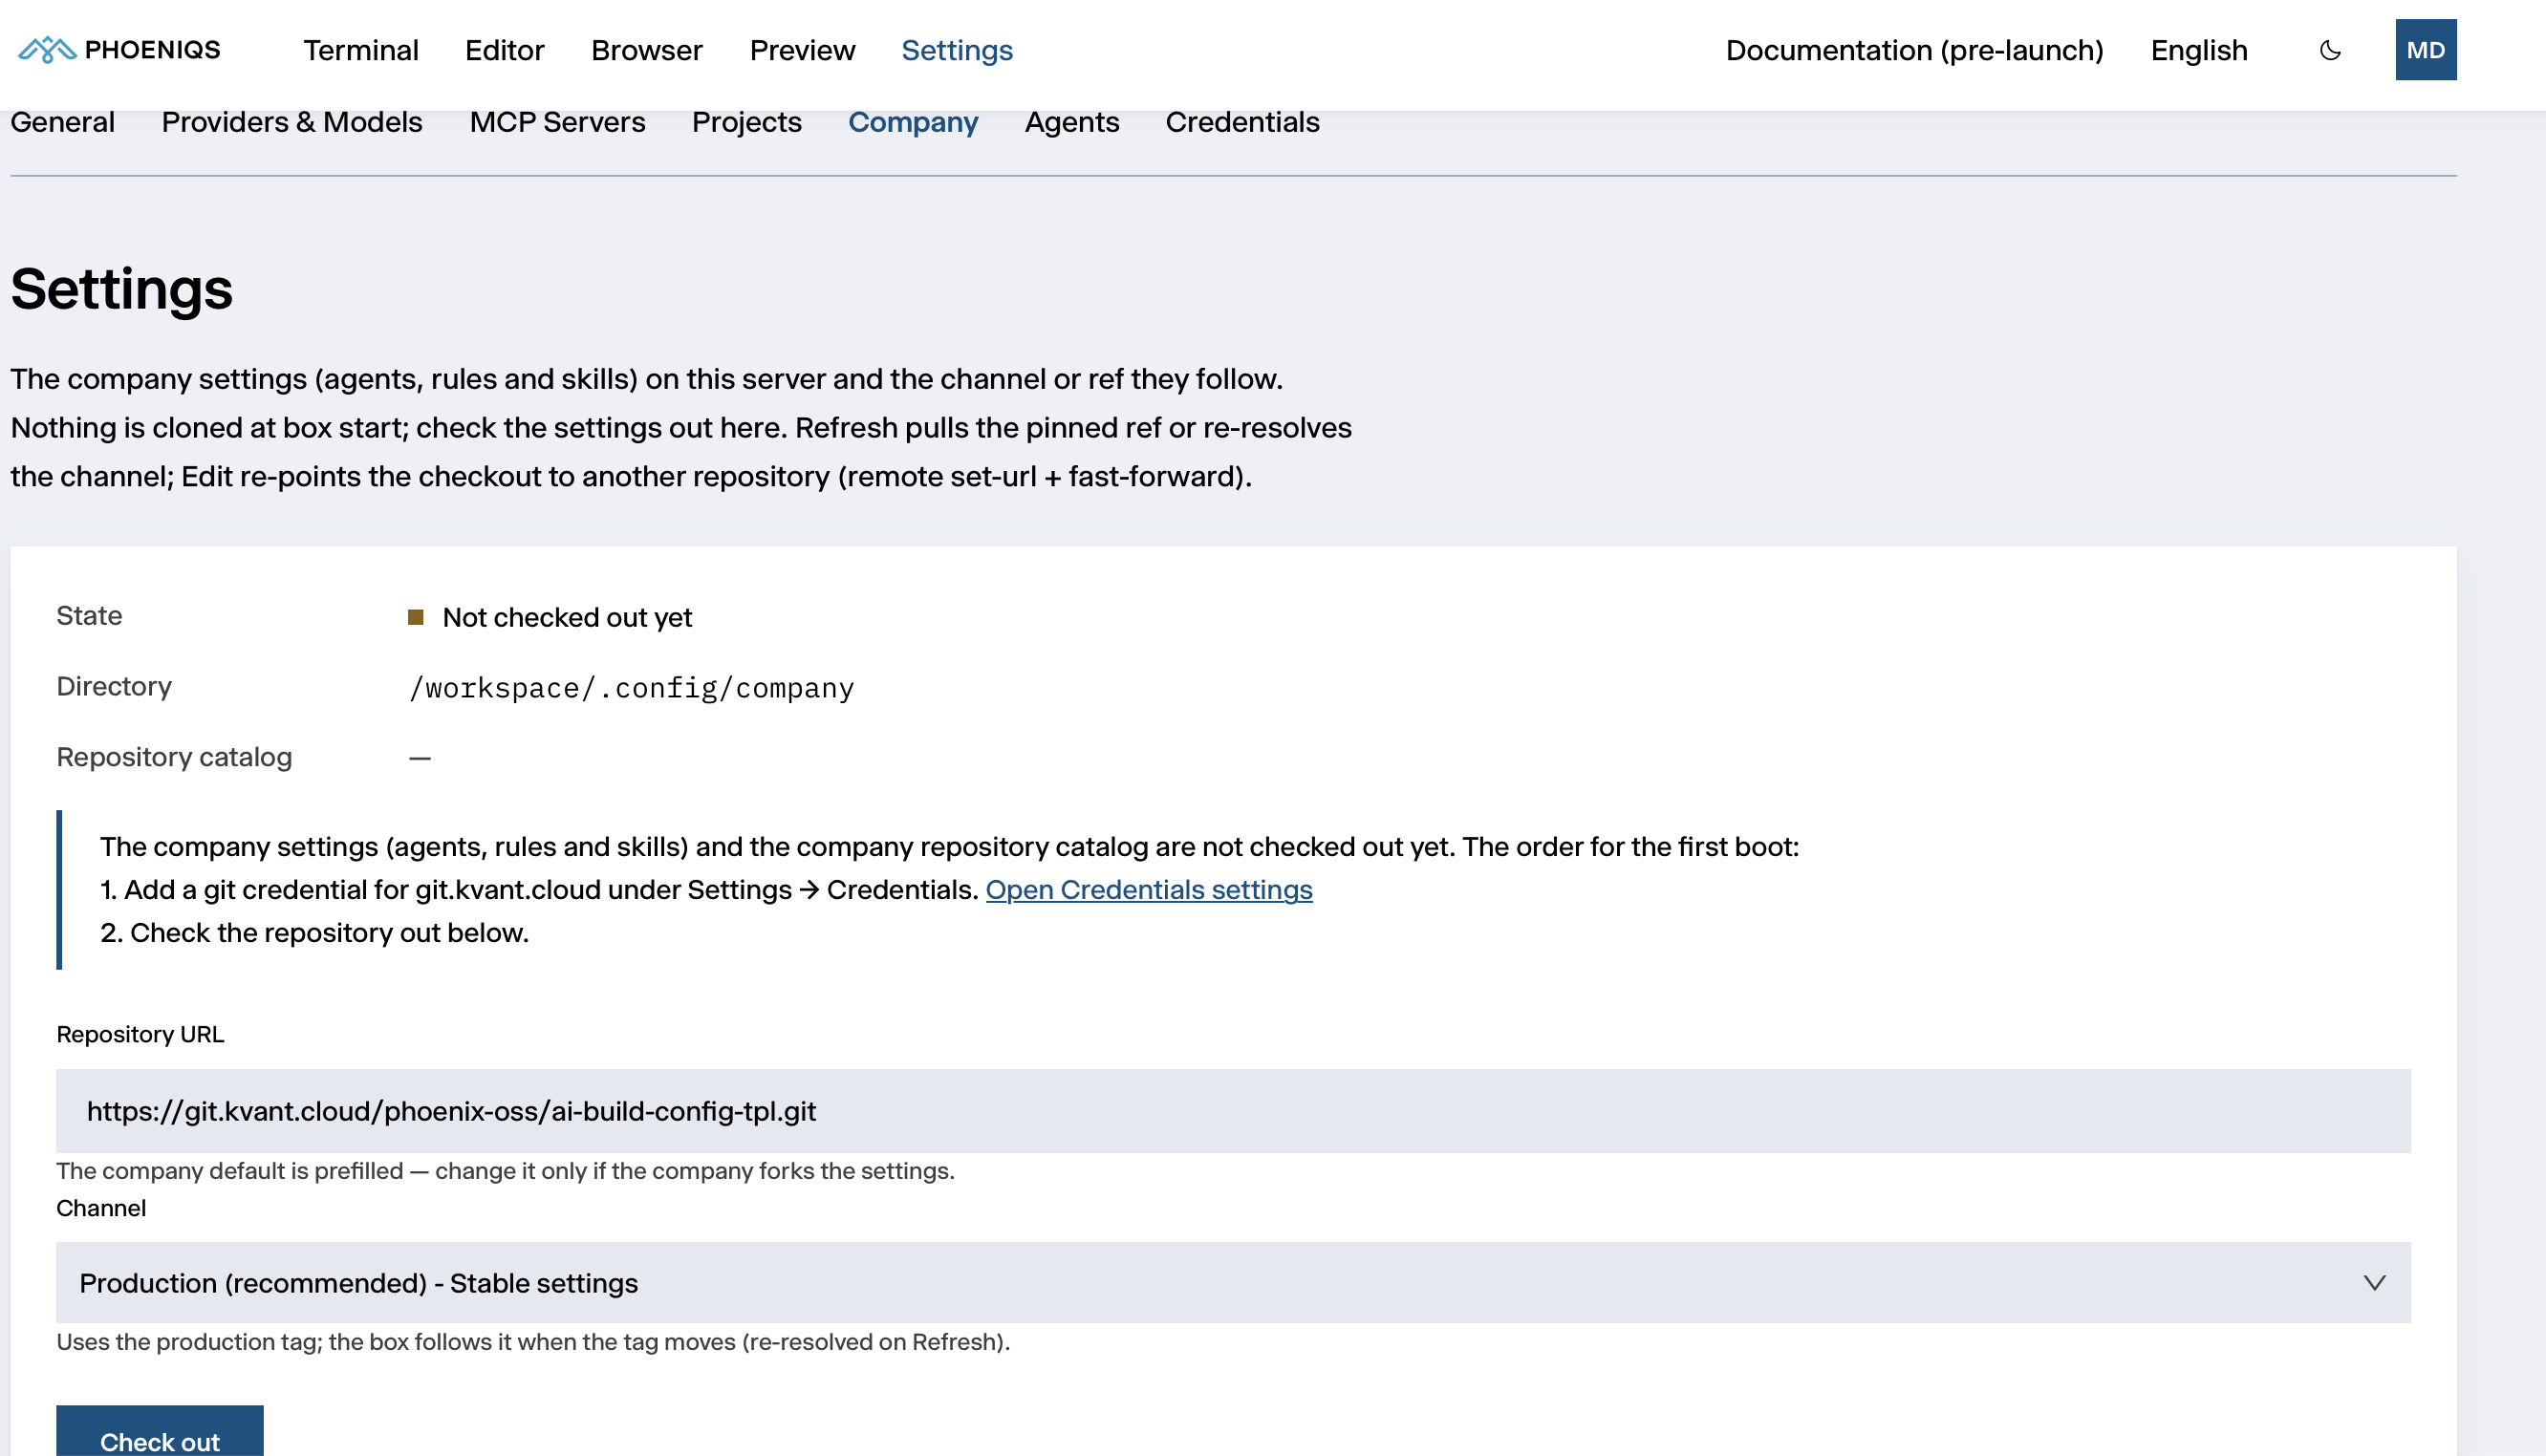
The prefilled repository is the PHOENIQS template, the right starting point for most teams. If your company maintains its own copy, enter its URL instead, and add a Git credential for its host first (step 3).
Tools from the company settings are available at once. Their agents, rules and skills take effect the next time the workspace starts. See Settings → Company.
#
3. Add a Git credential
- Go to Settings → Credentials.
- Under Repository credentials, click Add credential.
- Enter your Git host, your user name and an access token. Optionally, set the name and e-mail address your commits should carry.
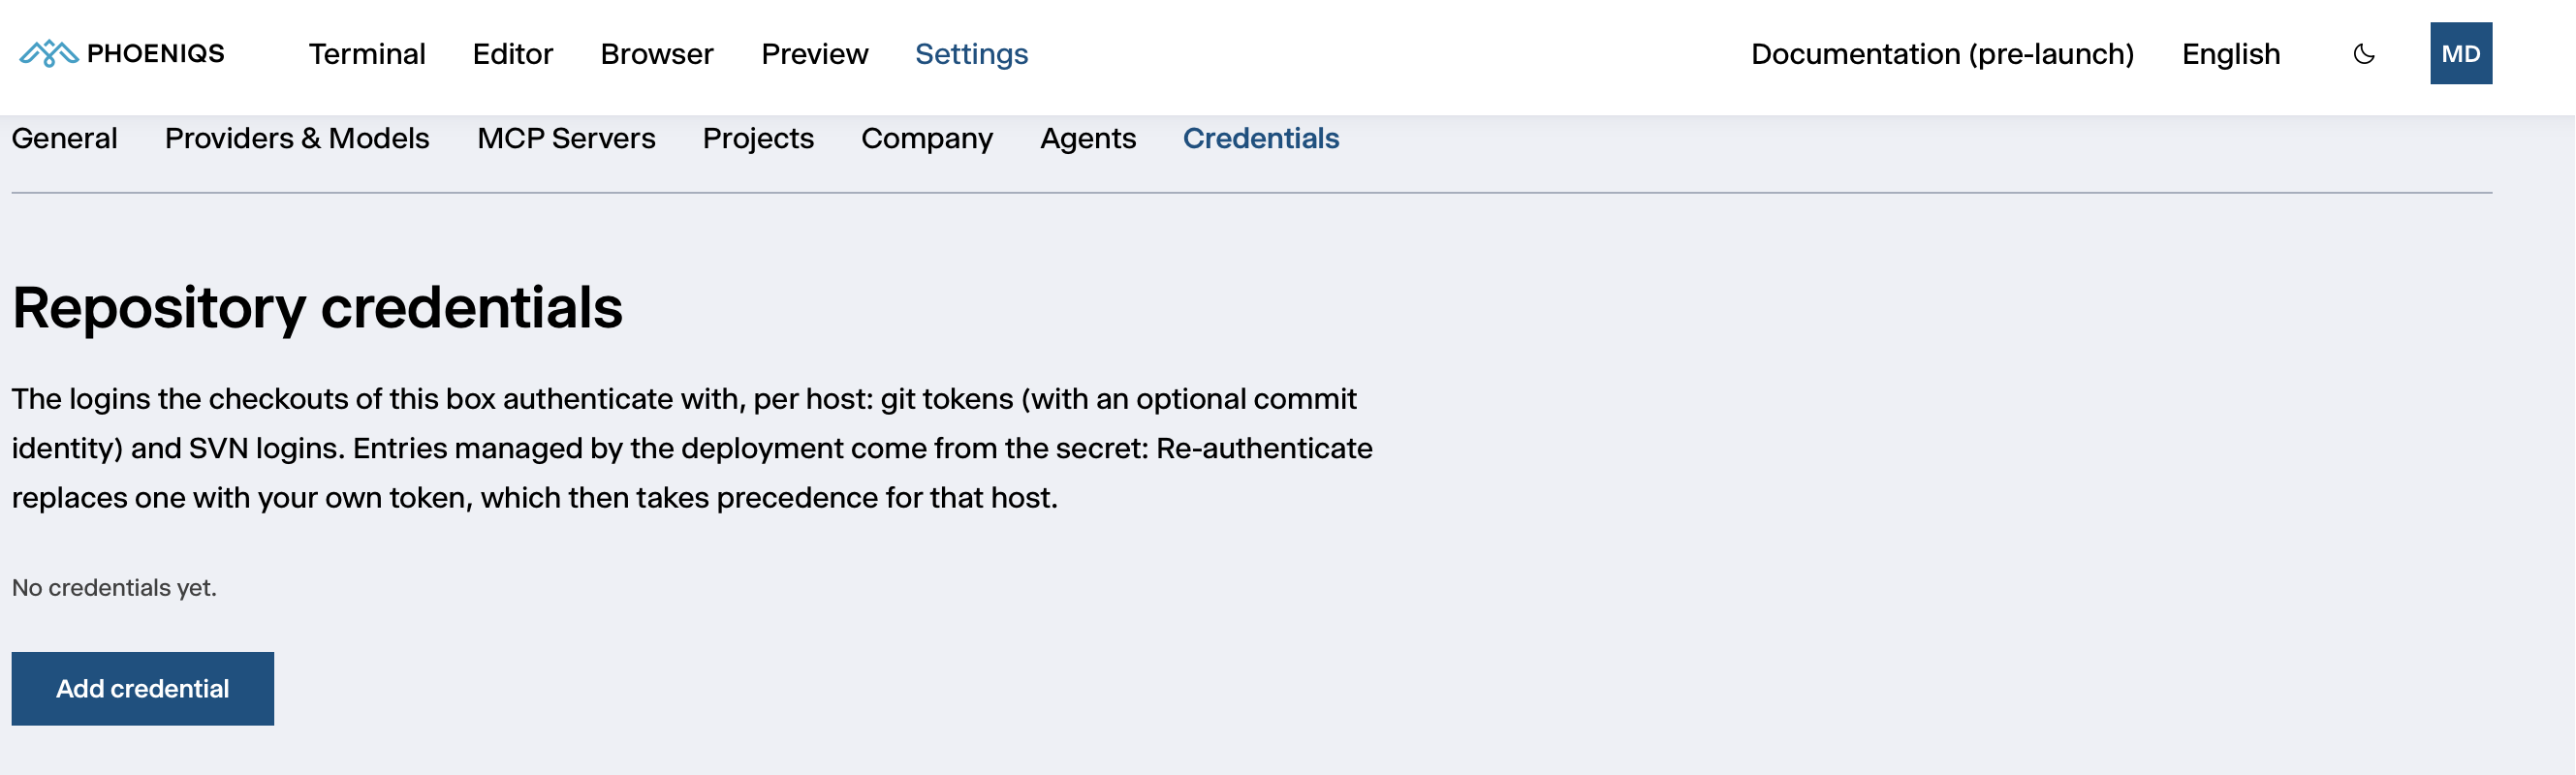
The workspace uses this credential to clone your repositories, and the agent uses it when it commits and pushes. It is stored encrypted on the workspace volume.
#
4. Add a repository and create a project
Repositories and projects are both managed in Settings → Projects:
- Under Repositories, click Add repository and enter the repository, as a short
group/reponame or a full URL. This only registers it; nothing is cloned yet. - Under Projects, click New project, name it, and choose the repository it should check out, optionally on a branch of its own.
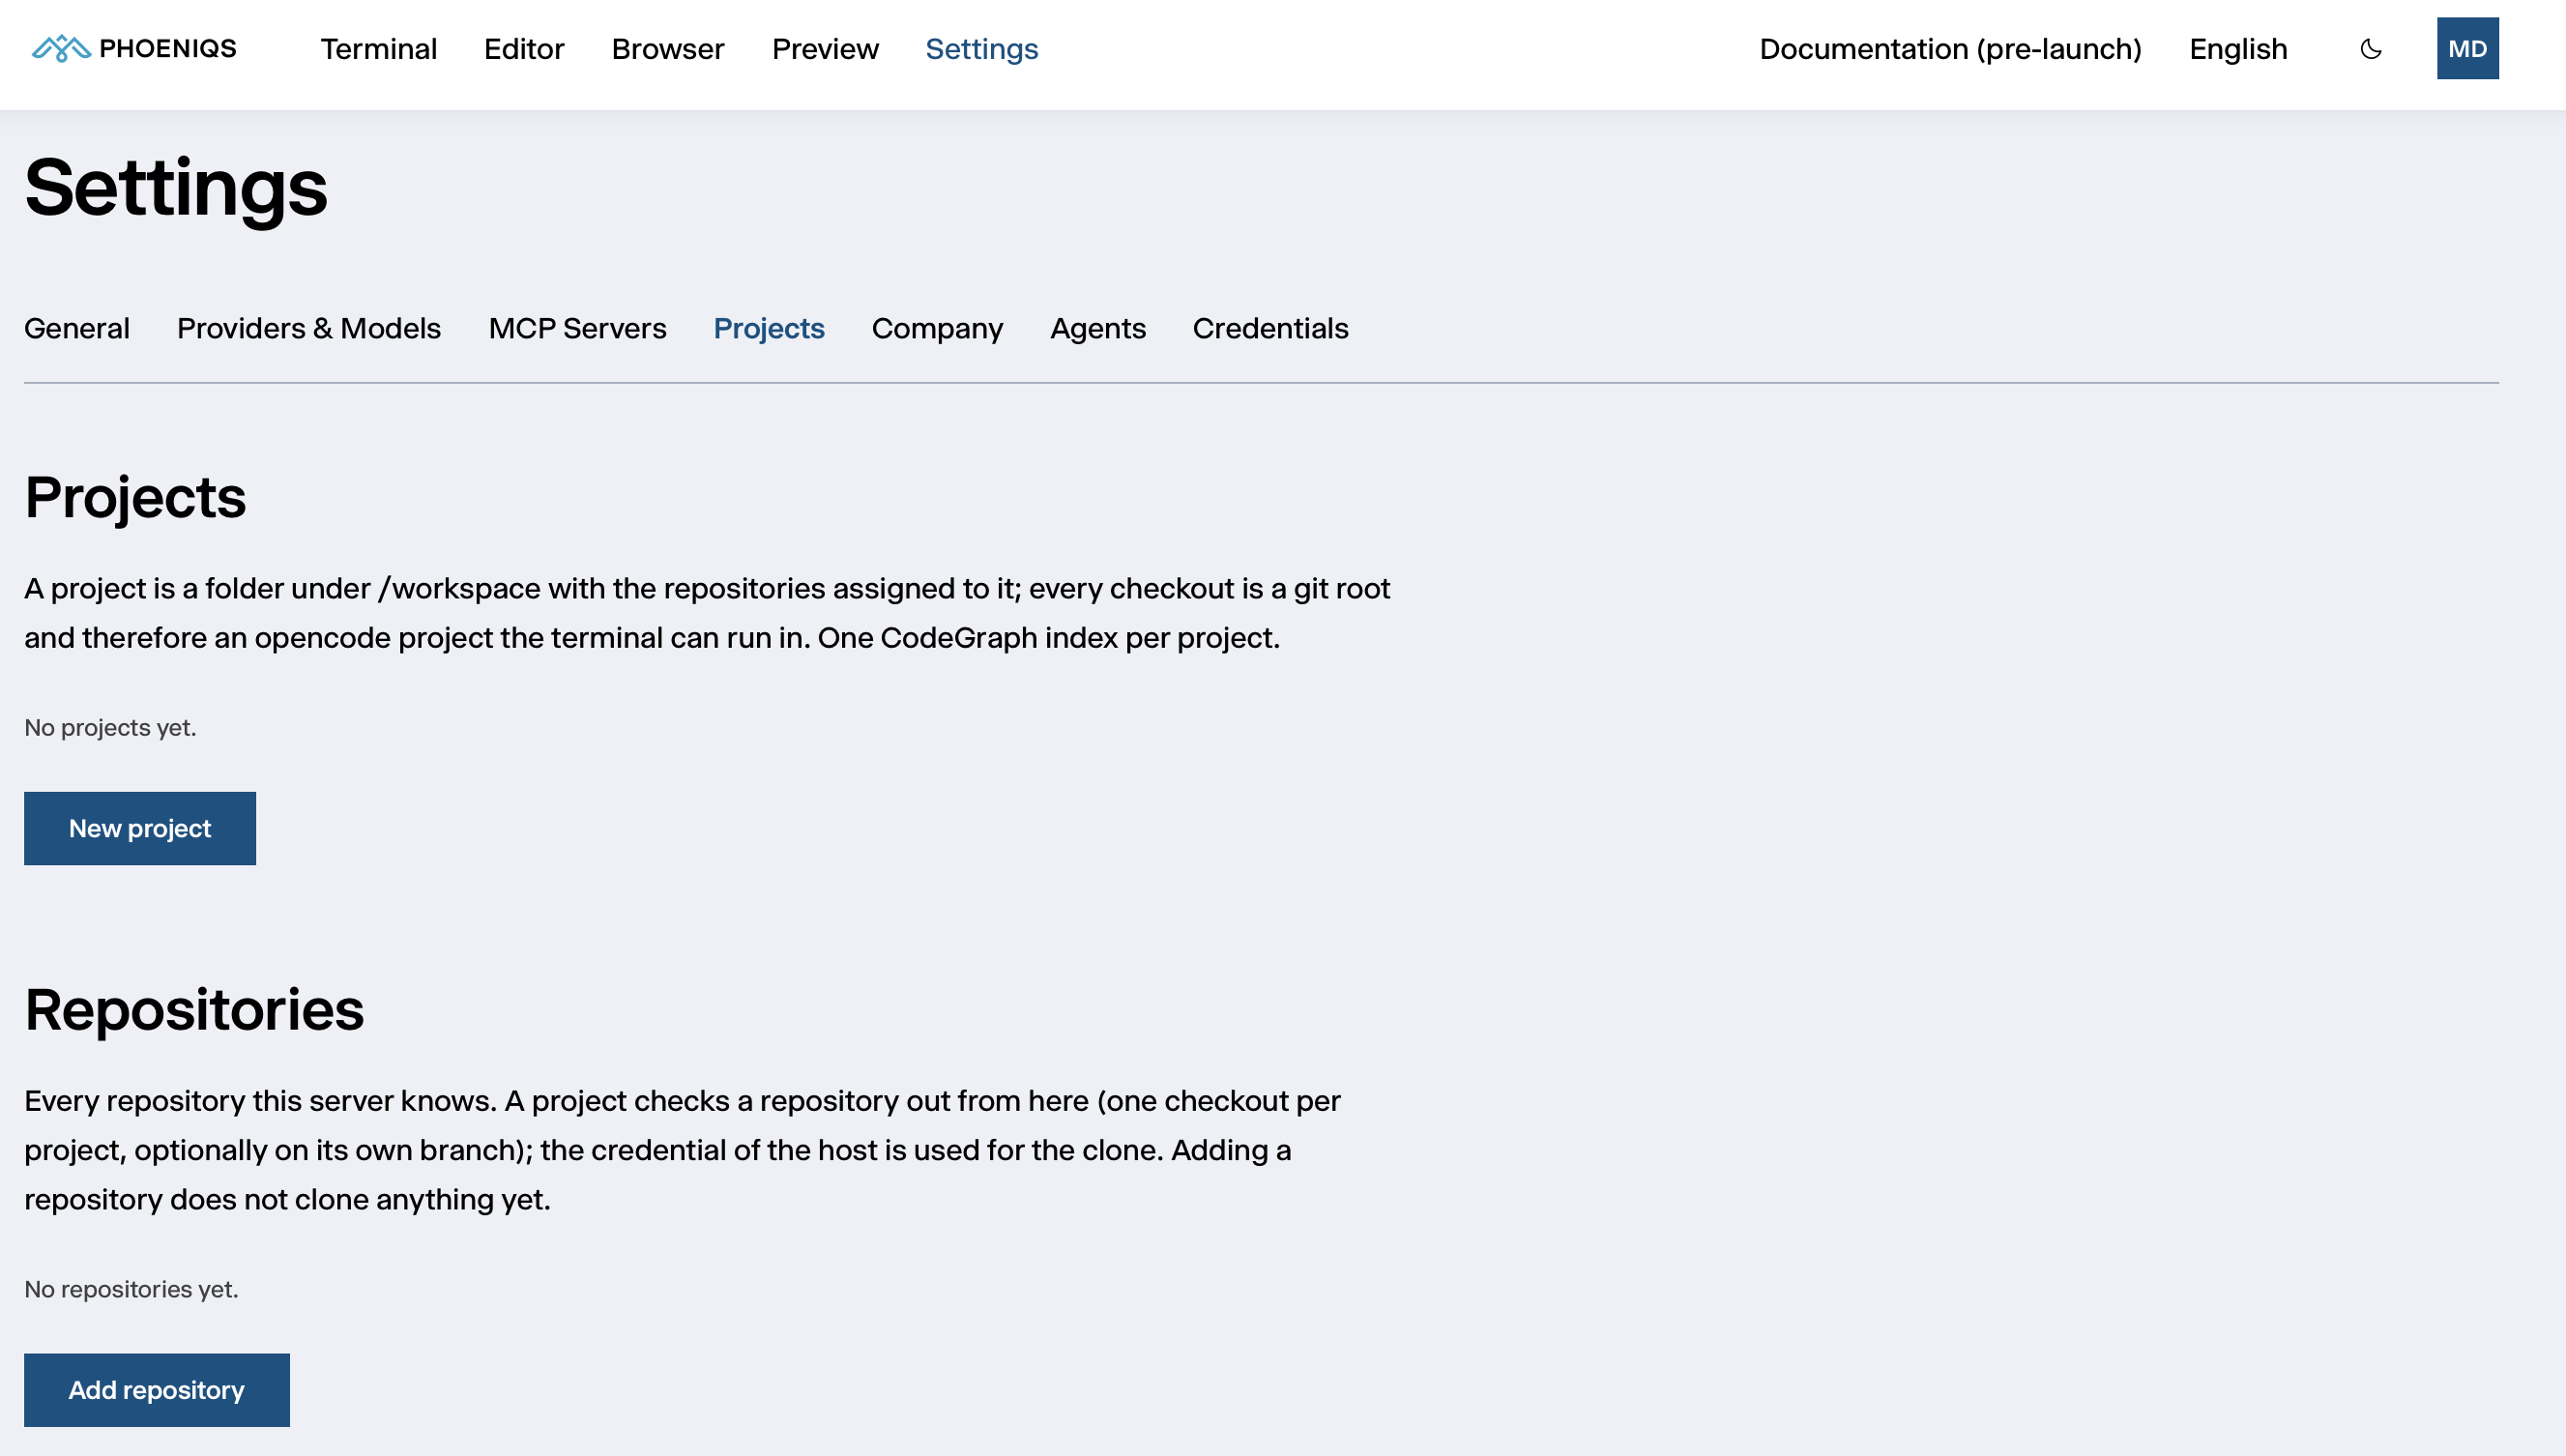
A project is a folder under /workspace, and its repository is cloned into it
with the credential from step 3. Checkouts are never pulled or reset for you,
so work in progress is safe. See
Settings → Projects.
#
5. Run your first task
- Go to Terminal and choose your project in Project directory.
- Click New terminal. This starts the agent in that project.
- Describe what you want. For example:
Build a welcome page for Phoeniqs AI Build and serve it on port 8080.
The agent writes the page, installs what it needs and starts a web server in the background. Then open the Preview tab. It shows whatever is running on port 8080 inside your workspace, so the page appears there as soon as the server is up.
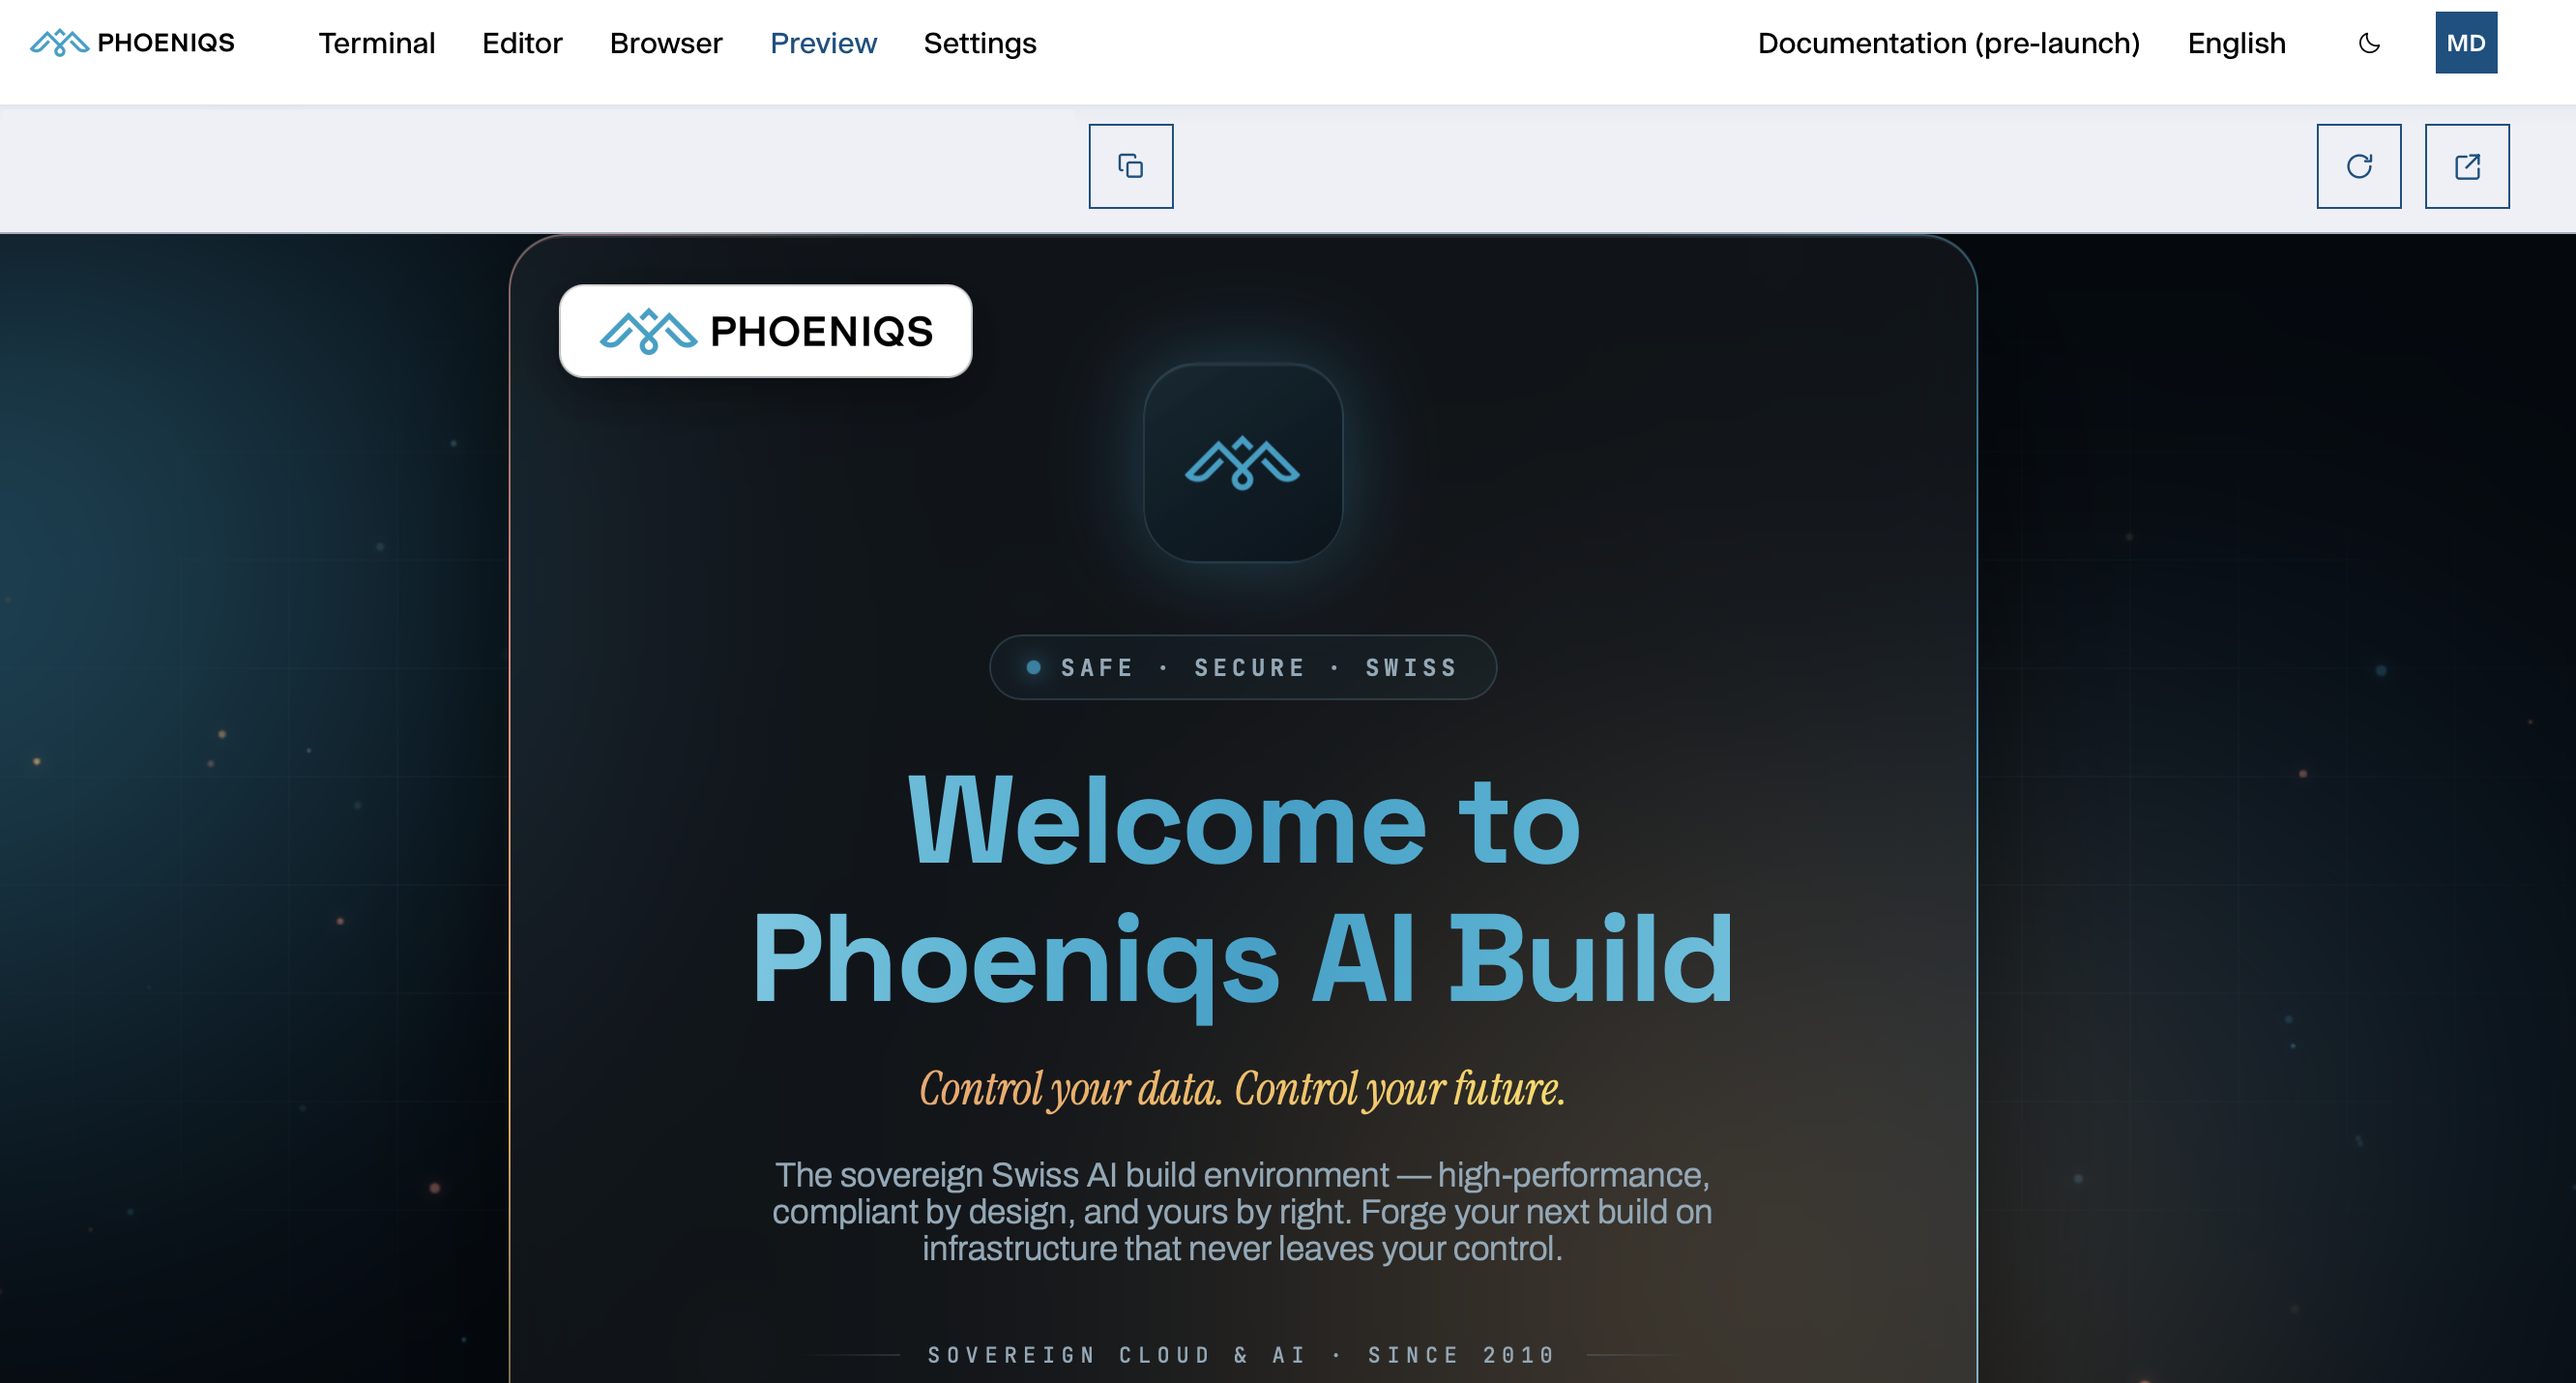
The buttons above the preview copy its address, reload it, or open it in a new window. With a dev server that supports live reload, such as Vite, changes made by you or the agent appear without reloading.
#
What's next